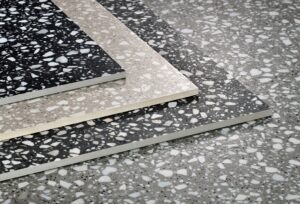
Terrazzo tiles are the most durable flooring material available, however, they are also very attractive and adaptable. It takes minimum upkeep. Despite their endurance, terrazzo tiles sometimes need maintenance.
Prior to delving into the fundamentals of terrazzo tiles restoration, it’s necessary to get a basic understanding of flooring. These tiles are composed of more than 75% recycled materials. This makes the tile very eco-friendly and contributes to the establishment’s green status.
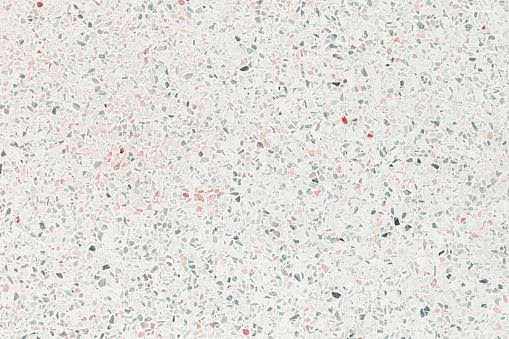
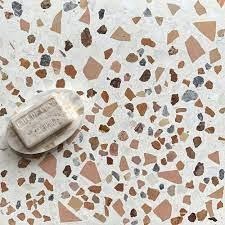
Terrazzo tiles are mostly constructed of glass, marble, and other colors chips. These are often misinterpreted as natural stones. Terrazzo tiles are simpler to repair than real stone. Here are some pointers for property owners and builders:
Avoid Using Solutions That Will Cause Damage to Your Tiles
The optimal method is to prevent exposing the terrazzo tiles to potentially hazardous components. If your terrazzo tiles seem dull or your floor has an etched appearance, this is the result of an owner’s error.
These owners have been cleaning the terrazzo tiles using acidic chemicals. These might be commercial cleaners. Exposure of the terrazzo tiles to this solution results in a drab and murky appearance over time.
You should avoid cleaning agents such as vinegar. Many people believe vinegar is a natural way to clean their floors. Vinegar is an acidic chemical that gives the surface a drab appearance. We suggest that you clean your tiles using water or neutral-PH floor cleansers. Avoid using these aggressive cleansers; this will save you a lot of money in the long run on repair charges.
Chips, Cracks, and Dings
Oftentimes, hefty things are dumped upon the terrazzo tiles. Pointed items might cause fractures in your floor tiles. These have an effect on older or less durable houses. Things disintegrate, leaving dents on the floor.
These incidents are still correctable. It may be restored similarly to real stone using cement grout or epoxy resins. Professionals resolve these issues with the burnishing procedure.
Following the burnishing process, they apply sealants. The solution permeates the tiles, providing additional protection and a more solid seal.
If you are not technically proficient in building, we strongly advise you to employ skilled specialists to do this task for you. These professionals are knowledgeable about the finest practices for burnishing and sealing. In comparison to do-it-yourself situations, it guarantees that your terrazzo tiles are fixed appropriately.
To locate these specialists, we recommend doing an online search. Consult their websites and testimonials. If you come across reviews, take heed of their former clientele’ remarks. Additionally, before hiring, it is essential that you get suggestions from friends.
I hope this post has thrown some light on how to repair terrazzo tiles. These tiles are just magnificent. To maintain their attractiveness, you must take care of them. Do not be alarmed if you discover cracks. Click here to read about Using these simple tips to repair your old or spoilt terrazzo tiles.
Are you interested in installing terrazzo tiles?
If you’re seeking to install terrazzo tiles, we’ve taken the worry out of the process by outlining the basic stages.
Step 1: Thoroughly clean
A standard terrazzo tiles project, such as the one at the Ewells’ home, comprises of spreading a cement and aggregate mix to a depth of approximately half an inch over a concrete slab. To prepare for the pour, workers carve inch-deep grooves into the slab, dubbed control joints, to direct the inevitable cracking that occurs as the concrete dries and shrinks.
Following that, Jimmy Stewart, Walter Miller, James Crowder, and Jason Aycock power-wash and sweep the slab to remove any loose debris. Following the cleaning, a scrape with dilute muriatic acid is used to eliminate algae that might deteriorate the link between the concrete and the terrazzo.
Step 2: Attaching Cement Dividers to the Slab
The slab is then cemented with zinc dividers to create a grid of three-foot squares. Plywood strips are temporarily affixed to the perimeter to prevent wet terrazzo from seeping into the areas of the slab where walls will be erected. Prior to pouring, the whole surface is coated with a thin layer of an epoxy solution. After preparing the slab, the terrazzo elements are blended according to a specific recipe: a quarter-pound of black pigment for every 94 pounds of white portland cement and 200 pounds of marble chips in this example. The chips are a blend of three colors: Cardiff green (70%), raven black (25%), and Georgia white (25%). (5 percent).
Step 3: Empty It
“Pour it out!” yells foreman Alan Aycock as Keith Kelly and others load wheelbarrows with the dark gray muck, drive them up onto the slab, and dump their loads. Terrazzo is spread and crushed immediately using a heavy roller.
Step 4: Reduce It
To further reduce it, many of the guys pull out their floats, stoop low, and trowel the surface.
Step 5: Scatter the Mix
As a farmer would feed his chickens, a worker sprinkles more aggregate mix to ensure that the completed surface is packed. When foreman Aycock cries, “Roll it off!” the heavy roller returns to crush the aggregate even more and drive out trapped air bubbles. Two days are required for the cement to cure. When the terrazzo kings, as the workers refer to themselves, return, the mud remains drab and lumpy but is as firm as stone. One of the monarchs leads a 500-pound grinder across the floor at Aycock’s next instruction.
Step 6: Using Spinning Stones to Smooth Out Lumps
The machine gradually smooths the lumps by spinning a dozen 4-inch-diameter diamond-grit stones. A more maneuverable, smaller grinder the size and shape of an elephant’s foot operates into corners and around plumbing, electrical, and other projects. After numerous passes, the stones are changed with finer grit ones to bring the shine back to life. Polishing the floor takes the better part of a day and brings out the silvery zinc-bordered squares and the gleaming marble hues. Hoovering the terrazzo shows microscopic pinholes, indicative of trapped bubbles that the roller did not remove. A thin slurry of colored cement is applied over the whole floor to fill them. Visit https://www.archdaily.com/910825/the-possibilities-of-pigmented-concrete-18-buildings-infused-with-color to read more about colored cement for your home.
Step 7: Shovel the Dirt
Prevent cement from flowing off the slab by erecting a dirt dam around it.
Step 8: Grind the Surface
After the cement hardens, Benny Byrd uses a smaller grinder to smooth out any leftover scratches. By this point, the guys can gaze down at the shining surface and see their reflections at work.